
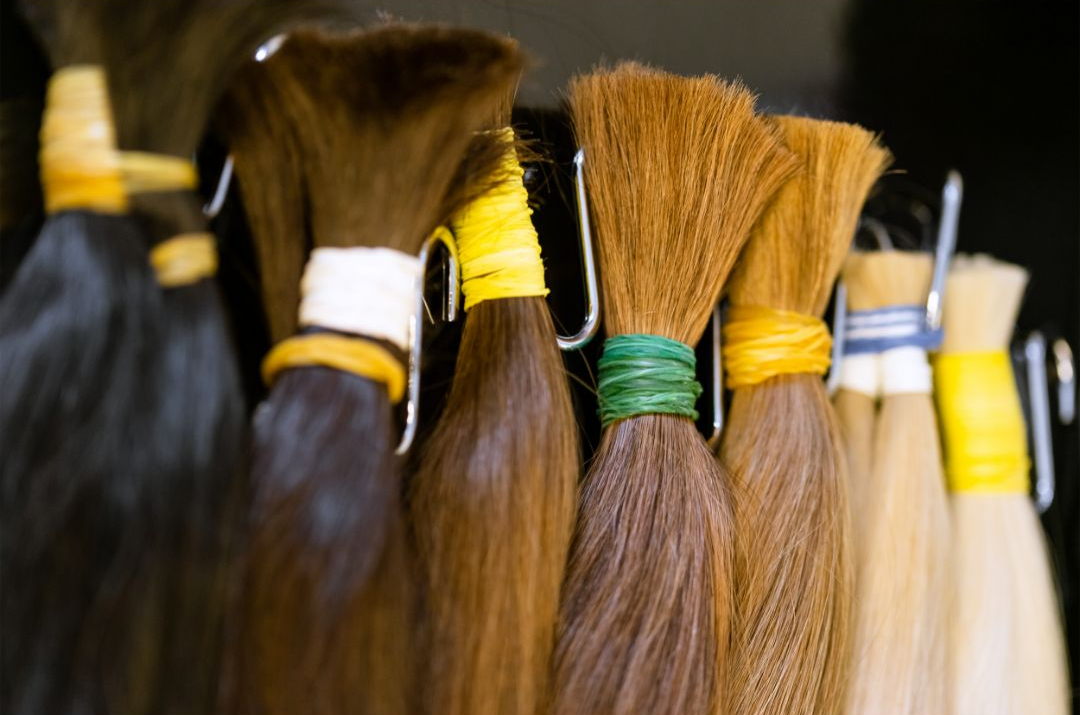
Hair extensions have become a popular and transformative beauty trend, offering individuals the opportunity to achieve long, voluminous, and glamorous locks. They have the power to boost confidence, enhance hairstyles, and add versatility to one's overall appearance. However, just as proper installation is essential for successful hair extension wear, knowing how to remove them safely is equally crucial.
While hair extensions can work wonders in elevating your style, the time will eventually come to bid farewell to them. Hair extension removal is a necessary step in the hair extension journey, whether you are wearing temporary clip-ins or semi-permanent tape-ins. By understanding the process of removal, you can ensure a smooth transition back to your natural hair while preserving its health and integrity.
Proper removal techniques play a pivotal role in protecting your natural hair. Improper removal methods can lead to hair breakage, damage to the scalp, and even hair loss. When done safely, hair extension removal ensures that your natural hair remains strong, vibrant, and ready for the next hair transformation.
This comprehensive guide will delve into the world of hair extension removal, providing insights into safely removing various types of hair extensions. From sew-ins and tape-ins to fusion and micro ring extensions, we will cover the step-by-step procedures and offer valuable tips to minimize potential damage during removal.
The blog will also discuss the differences between DIY removal and seeking professional help, allowing readers to make informed decisions based on their specific circumstances. Additionally, we will emphasize post-removal care to ensure the natural hair's health and vitality are maintained, setting the stage for a successful next hair extension installation.
Let's embark on this enlightening journey of hair extension removal, where you'll gain the knowledge and confidence to bid adieu to your extensions with grace and embrace your natural hair's beauty once again.
Tape-In Hair Extensions Removal
Tape-in hair extensions offer a semi-permanent hair transformation that lasts for several weeks. When it's time to remove tape-in extensions, proper techniques are essential to ensure the process is safe and effective. Understanding the adhesive used in tape-ins, following a detailed removal process, and weighing the pros and cons of professional removal versus DIY removal are all crucial aspects of successfully taking out tape-in extensions.
Tape-in extensions are attached to the natural hair using medical-grade adhesive tapes. These tapes are designed to be strong and long-lasting while remaining gentle on the natural hair. The adhesive is usually water-resistant, allowing the extensions to withstand regular washing and styling.
Process of Safely Removing Tape-In Extensions
Detangle and Prepare: Before starting the removal process, ensure your hair is completely dry and free of tangles. Gently detangle any knots using a wide-tooth comb.
Apply Tape Remover: To remove the adhesive, apply a specialized tape extension remover solution to the seam of each tape-in weft. Allow the solution to sit for a few minutes to break down the adhesive.
Gently Separate the Wefts: After the adhesive has loosened, gently separate the tape-in wefts from your natural hair. Hold the natural hair firmly near the roots to minimize pulling and tension.
Remove Residue: Once the wefts are detached, use the tape extension remover solution to dissolve any remaining adhesive residue. Comb through the hair to remove any adhesive particles.
Shampoo and Condition: Wash your hair with sulfate-free shampoo to remove any remaining residue and cleanse the hair thoroughly. Follow with a nourishing conditioner to keep the hair hydrated.
Allow for Rest: After tape-in removal, it's essential to give your natural hair a break before considering reapplication. Allow your hair time to recover and regain its strength.
Professional Removal vs. DIY Removal - Pros and Cons
Professional Removal
Pros: Professional stylists have experience and expertise in safe and efficient tape-in removal, minimizing the risk of damage to your natural hair.
Cons: Professional removal may incur additional costs, and scheduling an appointment may not always align with your convenience.
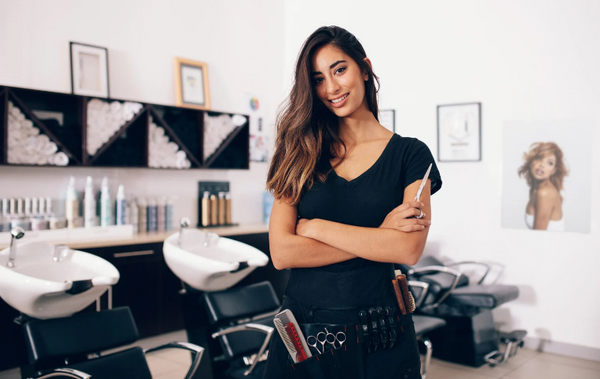
At IMH Studio, in Marbella, we offer any hair extensions removal or maintenance service, book a free hair extensions consultation and get personalized advice and recommendations.
DIY Removal
Pros: DIY removal allows you to save money and remove the extensions at your preferred time.
Cons: Improper DIY removal can lead to hair damage, tangling, and discomfort. Lack of experience may result in incomplete removal, leaving adhesive residue on your hair.
By understanding the tape-in extension removal process and weighing the options of professional removal versus DIY removal, you can make an informed decision that best suits your needs and ensures the health and beauty of your natural hair.
Sew-In Hair Extensions Removal
Sew-in hair extensions, also known as weave extensions, are a popular choice for those seeking a longer-lasting hair transformation. This method involves braiding the natural hair and then sewing the hair wefts onto the braids. When it's time to remove sew-in extensions, proper techniques are crucial to prevent damage to the natural hair. Understanding the braiding technique, safely undoing the braids, and following tips to minimize hair breakage during the removal process are essential for a successful removal.
The Braiding Technique Used for Sew-In Extensions
Sew-in extensions require a specific braiding technique to provide a secure foundation for the hair wefts. The stylist typically creates cornrow braids along the scalp, and the hair wefts are then sewn onto the braids using a needle and thread. The tightness and pattern of the braids play a significant role in the longevity and comfort of the sew-in extensions.
How to Safely Undo the Braids and Remove Sew-In Extensions
Prepare the Hair: Prior to removal, ensure your hair is clean and free of any styling products. Gently detangle your hair to prevent further knots during the removal process.
Locate the Thread: Identify the thread used to sew the extensions onto the braids. You may need to gently lift the hair wefts to see the thread underneath.
Clip the Thread: Using small scissors or a seam ripper, carefully cut the thread along the braids to release the hair wefts. Be cautious not to cut the natural hair in the process.
Untangle the Braids: Once the hair wefts are removed, gently untangle the braids using your fingers or a wide-tooth comb. Start from the ends and work your way up to minimize breakage.
Wash and Condition: After the braids are untangled, wash your hair with a sulfate-free shampoo and follow with a moisturizing conditioner to restore moisture.
Tips for Minimizing Hair Breakage During the Removal Process
Be Gentle: Handle your hair with care during the removal process to prevent unnecessary pulling and tension.
Use the Right Tools: Use sharp and precise scissors or a seam ripper to cut the thread, avoiding accidental cutting of the natural hair.
Detangle Gradually: Take your time to detangle the braids slowly and patiently, using minimal force to prevent hair breakage.
Deep Condition: After removal, deep condition your hair to replenish moisture and nourish the strands.
By understanding the braiding technique, safely undoing the braids, and following tips to minimize hair breakage during the removal process, you can ensure a seamless transition back to your natural hair. With proper care, your natural hair will remain healthy and ready for your next hair transformation.
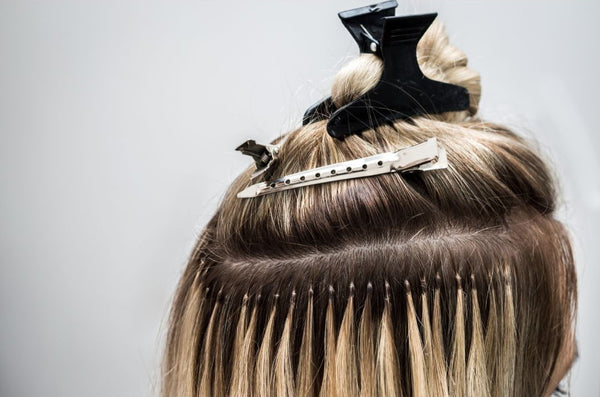
Micro Ring Hair Extensions Removal
Micro ring hair extensions offer a popular and versatile semi-permanent hair transformation. These extensions are attached using tiny metal rings, providing a secure and discreet method. When it's time to remove micro ring extensions, it's essential to understand the components involved, follow a step-by-step removal process, and provide proper aftercare to maintain the health of your natural hair.
Explanation of the Tiny Metal Rings Used in Micro Ring Extensions
Micro ring extensions, also known as micro loop or micro bead extensions, utilize small metal rings to secure the hair wefts to the natural hair. These rings come in various colors to blend with different hair shades and are typically lined with a protective silicone layer to prevent damage to the hair shafts.
Step-by-Step Guide to Removing Micro Ring Extensions
Gather the Required Tools: For micro ring extension removal, you'll need a pair of micro ring pliers designed specifically for this purpose.
Locate the Rings: Identify the micro rings along the hair wefts. They are usually placed in rows close to the scalp.
Open the Rings: Using the micro ring pliers, gently squeeze and open the rings to release the hair wefts. Take care not to apply too much pressure to avoid damaging the natural hair.
Slide Out the Extensions: Once the rings are open, slide out the hair wefts from the natural hair. Do this carefully to prevent tangling or pulling.
Remove Any Residue: After removing the extensions, check for any adhesive residue or tangles near the roots. Gently comb through the hair to remove any remaining particles.
Wash and Condition: Wash your hair with a sulfate-free shampoo and follow with a nourishing conditioner to cleanse and hydrate the strands.
Aftercare Tips for the Natural Hair Post-Removal
Deep Conditioning: After removal, deep condition your natural hair to restore moisture and nourish the hair fibers.
Trimming: Consider getting a slight trim to remove any split ends or damaged hair after the extension removal.
Avoid Heat Styling: Give your hair a break from heat-styling tools for a few days to promote hair health.
Gentle Handling: Be gentle with your natural hair as it may be more sensitive after extension removal.
By understanding the use of tiny metal rings in micro ring extensions, following a step-by-step removal guide, and providing proper aftercare to your natural hair, you can ensure a smooth and seamless transition back to your original hair. Embrace your natural locks and continue to care for them to maintain their health and beauty.
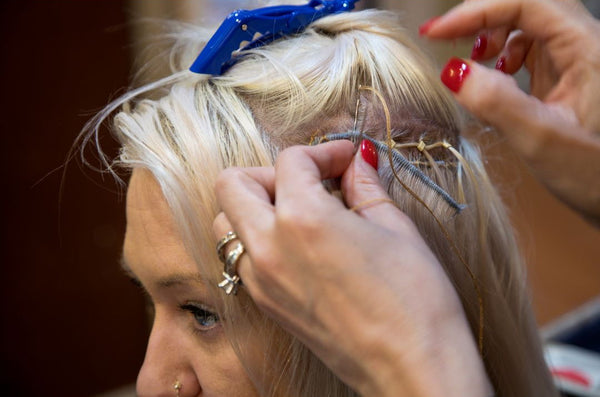
Fusion or Keratin Bond Hair Extensions Removal
Fusion or keratin bond hair extensions are a popular choice for those seeking long-lasting and natural-looking extensions. These extensions use a keratin-based adhesive to bond the hair wefts to the natural hair strands. When it comes time to remove fusion extensions, it is crucial to understand the keratin bond, follow a specialized removal process, and recognize the significance of professional removal for the best results.
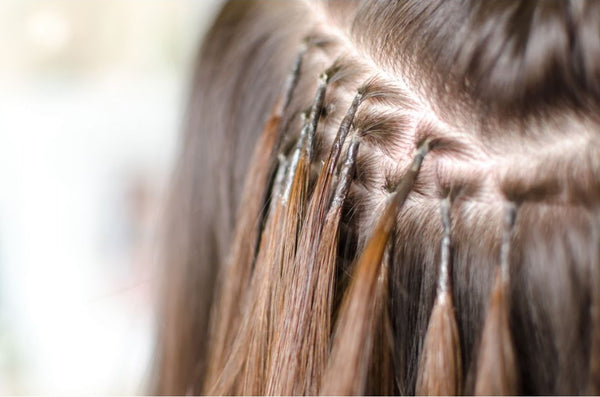
Understanding the Keratin Bond Used in Fusion Extensions
The keratin bond used in fusion extensions is a type of protein-based adhesive that resembles the molecular structure of natural hair. It is applied to the hair wefts and melted to create a secure bond when attached to the natural hair. The keratin bond is flexible, durable, and blends seamlessly with the hair, providing a natural and discreet extension application.
The Specialized Process of Removing Fusion Extensions
Consultation with a Professional: Before removing fusion extensions, it is advisable to schedule a consultation with a certified hair extension specialist. They will assess the condition of your extensions and natural hair, ensuring the safe removal of the extensions.
Sectioning the Hair: The specialist will divide your hair into manageable sections, ensuring each fusion bond is addressed individually.
Softening the Bonds: Using a specialized keratin bond remover or acetone-based solution, the specialist will soften the keratin bonds, gently breaking down the adhesive.
Gently Detaching Extensions: With the softened bonds, the specialist will gently detach the hair wefts from your natural hair. This process requires patience and precision to prevent hair breakage.
Post-Removal Cleansing: After the extensions are removed, the hair and scalp will be thoroughly cleansed to remove any residue from the keratin bond remover.
Wash and Condition: The hair will be washed with sulfate-free shampoo and conditioned to restore moisture and nourishment.
The Importance of Professional Removal for Fusion Extensions
Professional removal for fusion extensions is crucial due to the complexity of the process and the risk of damage to natural hair. A certified hair extension specialist has the expertise and tools to safely remove the extensions without causing harm to the natural hair. They can also assess the condition of your hair and provide guidance on proper aftercare post-removal.
Attempting to remove fusion extensions without professional assistance can lead to hair breakage, tangling, and discomfort. A specialist ensures a seamless transition back to your natural hair, preserving its health and integrity.
By understanding the keratin bond, following a specialized removal process, and recognizing the importance of professional removal, you can enjoy the benefits of fusion extensions while also ensuring the health and beauty of your natural hair. Always prioritize the expertise of a professional to achieve the best results during and after the removal process.
Pre-Bonded Hair Extensions Removal
Pre-bonded hair extensions are a popular choice for those seeking a semi-permanent hair transformation. These extensions come with small bonds pre-applied with adhesive, which are then attached to the natural hair using heat or ultrasonic technology. When it's time to remove pre-bonded extensions, understanding the bonding material, following a step-by-step removal process, and providing proper post-removal care are essential for maintaining the health of your natural hair.

Understanding the Bonding Material Used in Pre-Bonded Extensions
Pre-bonded extensions utilize a variety of bonding materials, such as keratin, polyurethane, or thermoplastic compounds. The bonding material is selected for its durability, flexibility, and ability to create a strong bond with natural hair. During the installation process, heat or ultrasonic technology is used to melt or soften the bonding material, fusing it with the natural hair strands.
Step-by-Step Guide to Safely Removing Pre-Bonded Extensions
Consultation with a Professional: Prior to removal, schedule a consultation with a certified hair extension specialist. They will assess the condition of your extensions and natural hair, ensuring a safe removal process.
Sectioning the Hair: The specialist will divide your hair into manageable sections, ensuring each bond is addressed individually.
Softening the Bonds: Using a specialized heat or ultrasonic tool, the specialist will apply controlled heat to soften the bonding material. This allows for the gentle removal of the extensions.
Gently Detaching Extensions: The specialist will carefully and gently detach the pre-bonded extensions from your natural hair with the softened bonds. It is essential to avoid pulling or tugging to prevent damage.
Post-Removal Cleansing: After the extensions are removed, the hair and scalp will be thoroughly cleansed to remove any residue from the bonding material.
Wash and Condition: Wash your hair with sulfate-free shampoo and condition it to restore moisture and nourishment.
Post-Removal Care to Restore the Natural Hair's Health
Deep Conditioning: After removal, deep condition your natural hair to replenish moisture and promote hair health.
Avoid Heat Styling: Give your hair a break from heat styling tools for a few days to prevent excessive heat damage.
Regular Trims: Consider getting regular trims to remove any split ends or damaged hair post-removal.
Nourishing Treatments: Treat your natural hair with nourishing treatments, such as hair masks or serums, to support its recovery.
By understanding the bonding material, following a step-by-step removal process with a specialist, and providing proper post-removal care, you can ensure a seamless transition back to your natural hair. Pre-bonded extensions can be a wonderful hair transformation, but it's crucial to prioritize the health and beauty of your natural hair throughout the removal process and beyond.
Removing Hair Extensions at Home vs. Seeking Professional Help
When it's time to remove your hair extensions, you may find yourself faced with a decision: should you attempt a DIY removal at home or seek the expertise of a professional stylist? Each option has its pros and cons, and understanding these factors can help you make an informed choice that ensures a safe and successful removal process.
Pros and Cons of DIY Removal
Pros
Cost-Effective: DIY removal can save you money as you won't incur additional salon fees.
Convenience: You can remove the extensions at your preferred time and in the comfort of your own space.
Independence: DIY removal allows you to be in control of the process and take your time.
Cons
Risk of Damage: Lack of experience can lead to improper removal techniques, potentially causing damage to your natural hair.
Tangling and Knots: DIY removal may result in tangled hair, making the process more challenging and time-consuming.
Incomplete Removal: It's easy to miss certain areas or adhesive residue, leading to issues when reapplying or damaging your natural hair.
Benefits of Professional Removal by a Hair Extensions Specialist
Pros
Expertise and Experience: A certified hair extension specialist has the knowledge and experience to safely and efficiently remove your extensions without causing harm to your natural hair.
Proper Tools and Products: Professionals have access to specialized tools and removal products that ensure effective and gentle removal.
Thorough and Even Removal: A stylist can ensure that all extensions are removed evenly and any adhesive residue is cleaned properly.
Cons
Additional Cost: Seeking professional removal may involve extra expenses compared to DIY removal at home.
Scheduling Constraints: You'll need to book an appointment, which may not always align with your preferred time frame.
If you want to have your hair extensions professionally removed or need a maintenance service you can come to IMH Studio, the leading experts in hair extensions in the Costa del Sol. Don't miss out on our free consultation offer – book now to discuss your hair extension options.
Factors to Consider When Deciding Between DIY and Professional Removal
Type of Extensions: The type of hair extensions you have may influence your decision. More complex methods, such as fusion or pre-bonded extensions, often require professional removal due to the use of heat or special tools.
Your Experience: If you have prior experience with hair extension removal and feel confident in your abilities, DIY removal may be an option. Otherwise, seeking professional help is the safer choice.
Condition of Your Natural Hair: If your natural hair needs extra care or is prone to damage, it's best to opt for professional removal to minimize potential harm.
Time and Convenience: Consider your schedule and availability. DIY removal at home may be more convenient if you have time and patience, while professional removal can be quicker and more efficient.
In conclusion, deciding between DIY removal at home and seeking professional help depends on various factors. If you are experienced, confident, and have the right tools, DIY removal can be cost-effective. However, for the best results and to safeguard the health of your natural hair, professional removal by a certified stylist is the recommended choice. Prioritize the well-being of your hair and make a decision that aligns with your specific circumstances and preferences.
Post-Extension Removal Care for Natural Hair
After removing your hair extensions, it's essential to give your natural hair some extra love and care. The removal process, while done professionally and safely, can still put some stress on your hair. Nourishing treatments, protective styling, and proper preparation for future hair extensions are all crucial aspects of post-extension removal care to ensure your natural hair remains healthy and ready for its next transformation.
Nourishing Treatments to Rejuvenate Natural Hair Post-Removal
Deep Conditioning: Treat your natural hair to a deep conditioning mask to replenish moisture and restore its vitality. Look for products with nourishing ingredients like shea butter, argan oil, or keratin.
Hot Oil Treatments: Incorporate hot oil treatments into your routine to provide your hair with essential nutrients and strengthen the strands.
Protein Treatments: Consider using protein treatments to repair any damage and improve the overall health of your hair.
Leave-In Conditioners: Apply leave-in conditioners regularly to keep your hair hydrated and protected from external elements.
Styling and Protective Measures to Promote Hair Growth and Health
Avoid Heat Styling: Give your hair a break from heat styling tools to prevent further damage and allow your hair to recover its natural texture.
Low-Manipulation Styles: Opt for low-manipulation hairstyles, such as braids, buns, or ponytails, to protect your hair and minimize breakage.
Silk or Satin Pillowcases: Sleep on silk or satin pillowcases to reduce friction and prevent hair breakage while you rest.
Trimming: Schedule regular trims to get rid of any split ends and maintain the health of your hair.
Tips for Preparing Natural Hair for the Next Hair Extension Installation
Consultation with a Professional: Before your next hair extension installation, consult with a certified stylist to assess the condition of your natural hair and determine if it's ready for extensions.
Scalp Health: Ensure your scalp is clean and healthy before the next installation to promote a strong foundation for the extensions.
Follow Aftercare Recommendations: Adhere to any aftercare recommendations provided by your stylist after the extension removal to support your natural hair's recovery.
Limit Use of Chemical Treatments: Avoid excessive use of chemical treatments, such as relaxers or perms, to minimize hair damage.
By following these post-extension removal care tips, you can help your natural hair recover from the extension experience and maintain its health and beauty. Taking the time to nourish and protect your hair ensures that it's in the best condition for your next hair extension adventure, giving you the freedom to experiment with different styles while keeping your natural hair vibrant and strong.
Conclusion
In the quest for fabulous hair transformations, hair extensions have become a popular choice for many individuals. These extensions allow us to experiment with different lengths, colors, and styles, enhancing our overall look and boosting our confidence. However, it's essential to remember that proper extension removal is just as crucial as the installation process.
Recap of the Various Hair Extensions Removal Processes
Throughout this blog, we've explored the diverse world of hair extensions and their removal techniques:
Clip-In Hair Extensions: Easily removed by unclipping the wefts from your natural hair.
Tape-In Hair Extensions: Soften the adhesive and gently peel the wefts away from your hair.
Sew-In Hair Extensions: Carefully undo the braids and gently remove the extensions from your natural hair.
Micro Ring Hair Extensions: Open the tiny metal rings and slide the extensions out.
Fusion or Keratin Bond Hair Extensions: Apply heat to the bonds to soften them before gently detaching the extensions.
Halo Hair Extensions: Simply remove the halo extension by unhooking or lifting it away from your head.
Pre-Bonded Hair Extensions: Soften the bonding material and gently detach the extensions from your hair.
Tape-In Skin Weft Hair Extensions: Remove the extensions by gently peeling the tape-in skin wefts away from your scalp.
The Importance of Safe Removal Techniques
Hair extension removal should always be done with care and precision to protect your natural hair. Rushing the process or using improper techniques can lead to damage, tangling, and breakage. Whether you choose to remove the extensions yourself or seek professional help, safety should be the top priority.
Prioritize the Health of Their Natural Hair During Extension Removals
As you bid farewell to your extensions, remember that your natural hair deserves extra attention and nourishment. After the removal process, pamper your hair with deep conditioning, nourishing treatments, and protective styles. Allow your hair to recover and rejuvenate before considering your next hair extension adventure.
In the end, the key to a successful and satisfying hair extension experience lies in the careful balance of installation, maintenance, and removal. By treating your natural hair with the love and respect it deserves, you can enjoy the beauty and versatility of hair extensions while maintaining your locks' health and radiance. So, embrace your natural hair, nurture it with kindness, and savor the journey of creating your own unique and beautiful hair story.
If you are in the Costa del Sol, Malaga, Torremolinos, Benalmadena, Marbella or Mijas. and need any hair extensions service, don't hesitate to book a free consultation with us, we offer a premium experience in a Hair Extensions Only Salon.
We've put together an efficient FAQ on how to safely remove hair extensions, aimed at resolving doubts and providing clear answers. Our goal is to equip you with the knowledge for proper care in water, ensuring your peace of mind.